This section provides a step-by-step explanation of how to program in Ladder Diagram using widget "LadderEditor".
Adding items
There are 4 different types of items:
Item |
Description |
|
Contact: Contacts can be connected to the left power rail. They can be linked to other contacts/timers on the left or right. Contacts cannot be connected to the right power rail. |
|
Coil: Coils can only be used on the right power rail of the ladder diagram. They are connected to the left with contacts/timers. |
|
Switch-on delay: Switch-on delays can be connected to the left power rail. They can be linked to other contacts/timers on the left or right. Switch-on delays cannot be connected to the right power rail. |
|
Switch-off delay: Switch-off delays can be connected to the left power rail. They can be linked to other contacts/timers on the left or right. Switch-off delays cannot be connected to the right power rail. |
In order to create an executable program, items must be added from the toolbar. They can be added to the programming interface using drag-and-drop.
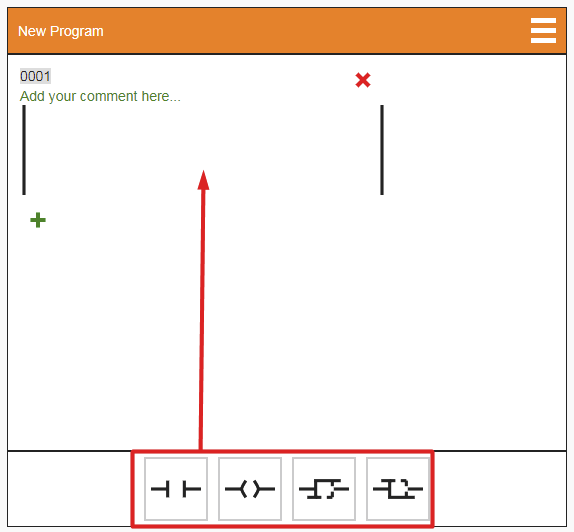
The marked sections indicate where the item can be placed:
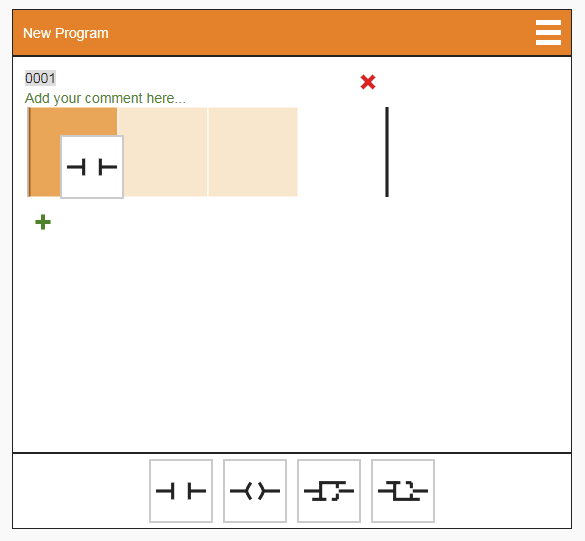
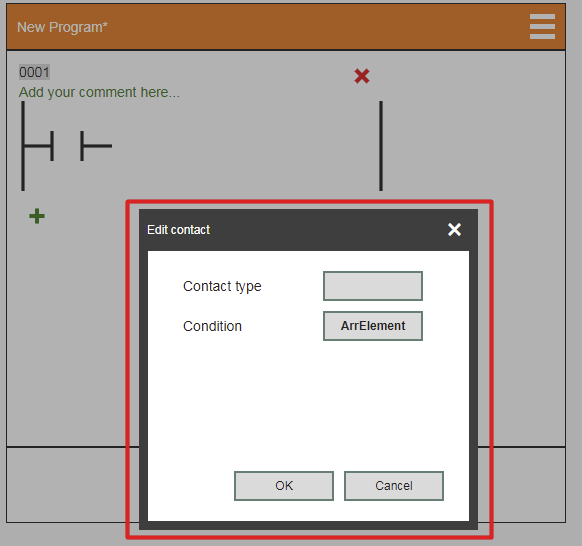
If the item is placed, a dialog box appears automatically to select which variable ("Condition") and type of item ("Contact type") should be added. The variables are defined in the MpCodeBox configuration. For possible item types, see section Contacts and coils.
Adding a timer
There are 2 types of timers. These are the switch-on delay and switch-off delay.
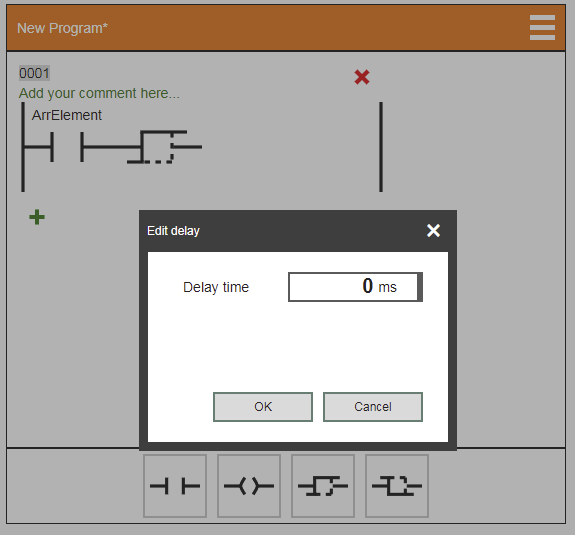
When items are added, a dialog box appears automatically to define the timer. The time is specified in milliseconds.
Editing an existing item
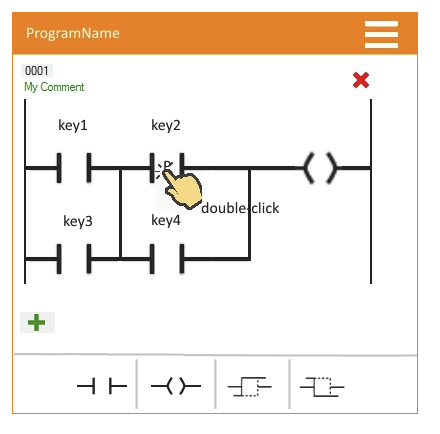
In order to edit an existing item (e.g. to bind another variable), double-click on the desired item to select it:
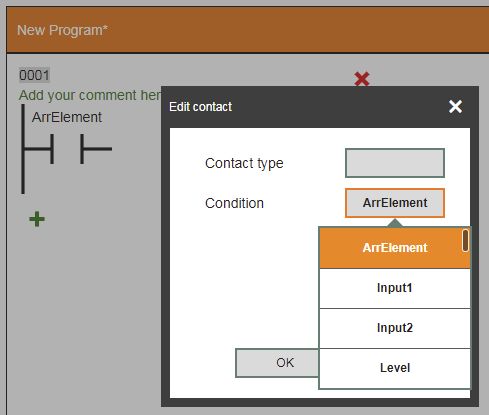
A dialog box then appears where a different variable can be selected, for example:
Adding subsequent/parallel items
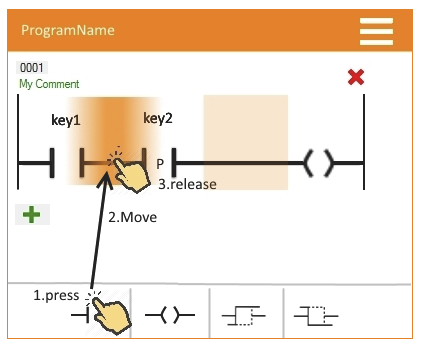
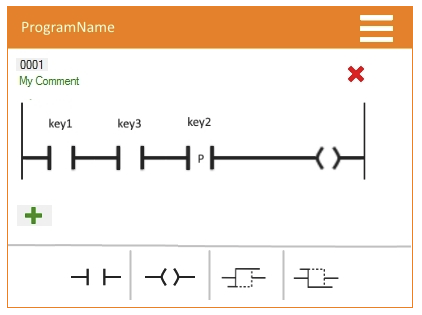
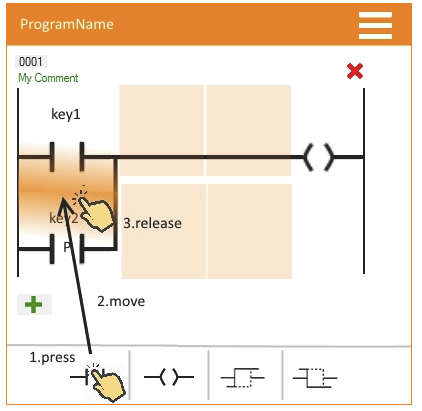
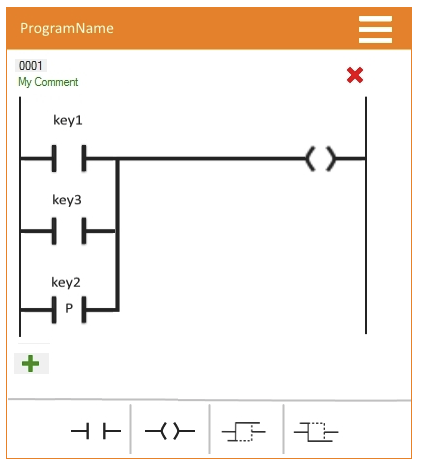
In order to add an item after or parallel to another item, select an item from the toolbar and add it to the desired position using drag-and-drop.
Adding a subsequent item:
Adding a subsequent item |
Result |
Adding a parallel item:
Adding a parallel item |
Result |
Moving an existing item
To move an existing item, select it and move it to the new position using drag-and-drop.
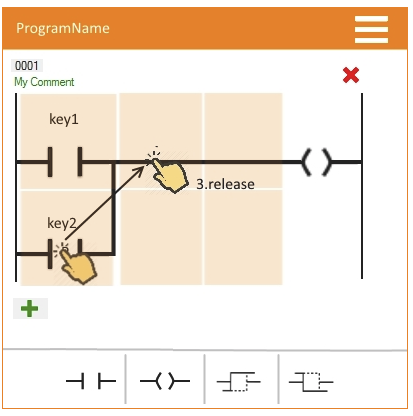
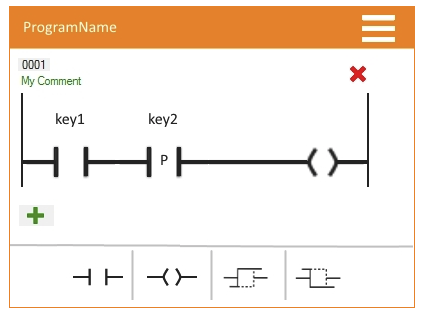
The item will then be shown at the new position:
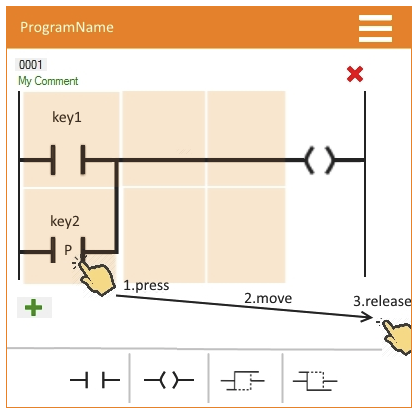
Deleting an item
To delete an item, select it and move it outside the network.
Connecting items
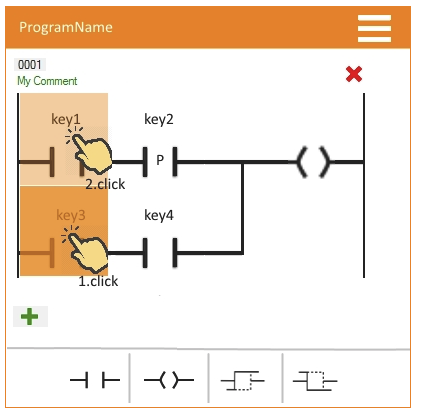
Items can be connected to one another. Click on an item to create connecting lines. The clicked area is darkened. The possible connection paths are lighter:
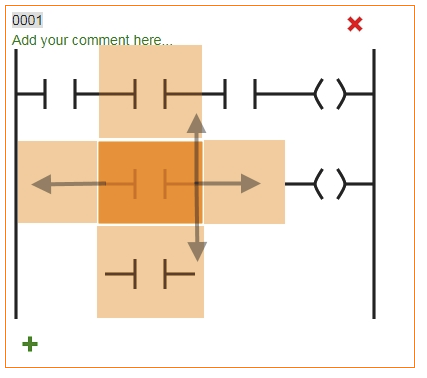
Depending on where a connecting line should be created, it is possible to select below, above, to the left or to the right.
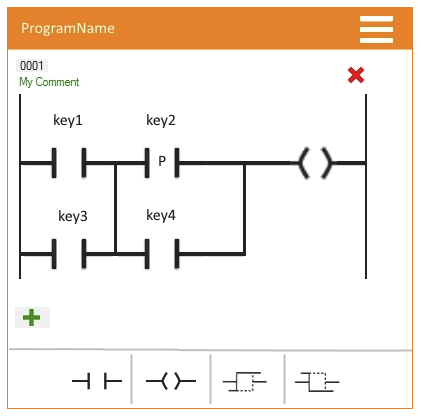
Example for creating a connecting line above:
Creating a connecting line above |
Result |
Adding a network
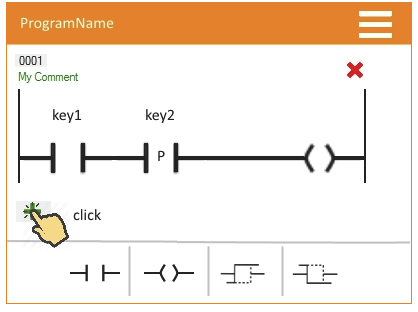
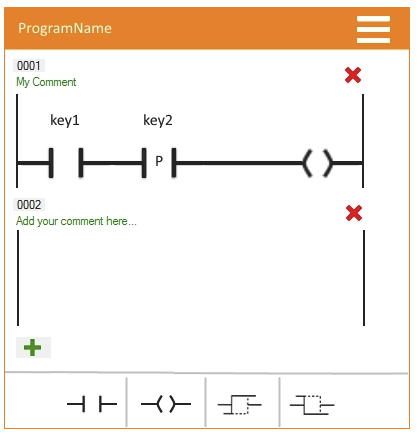
To add a network, click on the green "Plus" icon. The network is placed below the existing network:
Adding a network |
Result |
Deleting a network
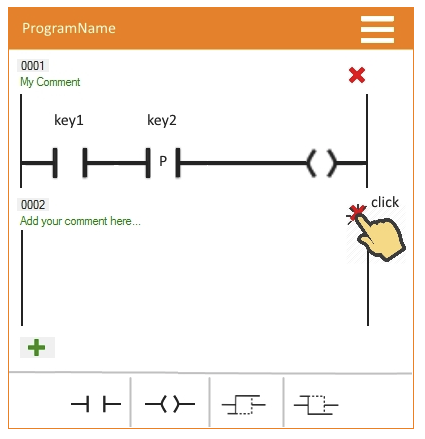
To delete a network, click on the red "X" icon:
Deleting a network |
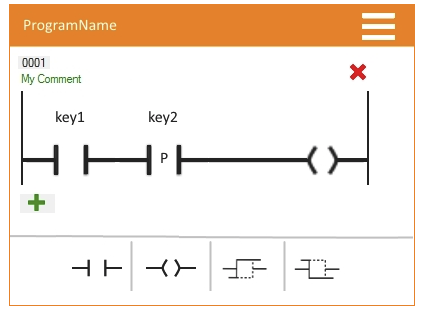
Result |
Adding a network comment
A comment can be added to a network. Property showComments for widget "LadderEditor" must be set to true for this.
Then click on the sample comment:
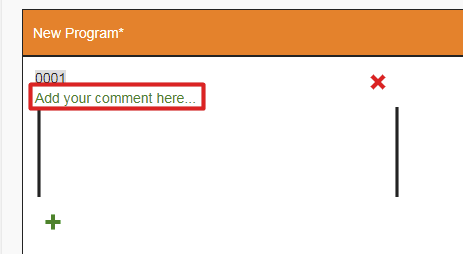
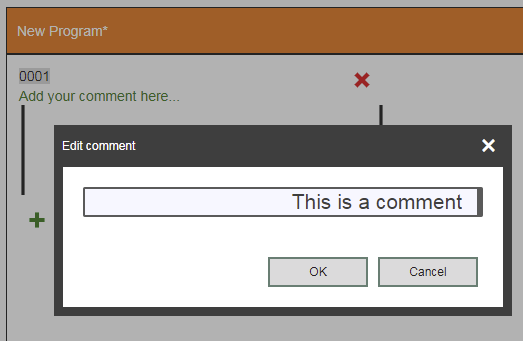
A dialog box then opens where the new comment can be entered.
Invalid network
If a program is saved, its validity is checked. Saving is initiated from the title bar. For more information, see Working with the title bar. If a program is invalid, then a red bar will be shown to the left of the network.
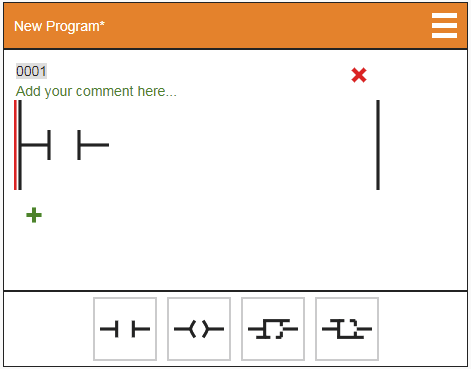
Reasons a program may be invalid:
•No items in the network
•Open item or connecting line
•Item without a macro
•Invalid connecting lines


