This section includes detailed explanations for the concept of widget "AlarmHistory".
Configuring columns
The display and arrangement of the columns in widget "AlarmHistory" is managed by adding widget "AlarmHistoryItem".
•Possible columns
•instanceID
•message
•name
•scope
•severity
•timestamp
•additionalInformation1
•additionalInformation2
•code
•category
•new state
•old state
Adding columns:
Columns can be added in widget "AlarmHistory" simply by dragging and dropping widget "AlarmHistoryItem". The respective column type (e.g. message) can be defined in widget "AlarmHistoryItem" using property "columnType". By default, widget "AlarmHistory" is sorted in ascending order starting from the first column.
Changing the column width:
Clicking on the header of a column displays handles that can be pulled left or right to set the column width.
Define additional information
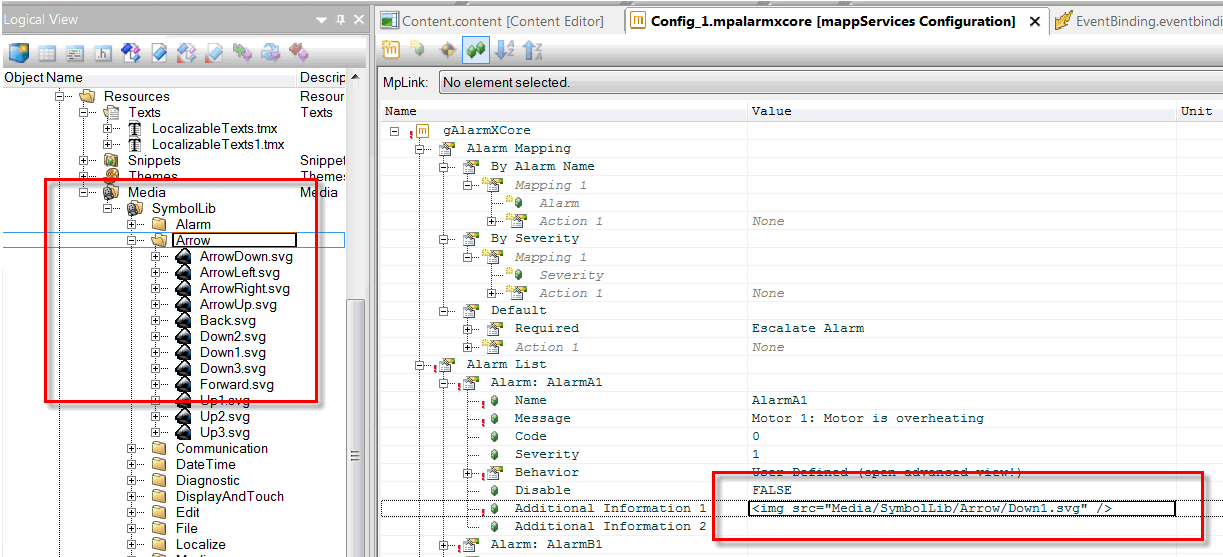
It is possible to display images in columns "additionalInformation1" and "additionalInformation2". This is done in the MpAlarmXCore configuration by specifying an image as follows in "Additional Information 1" or "Additional Information 2":

It is important that the image to be used is in folder "Media".
Loading entries
The widget does not load all data into the displayed list at once. A maximum of 1000 entries are loaded into the widget at the beginning. To load more data, the user must either scroll to the bottom of the list or click to the last page. Then more data will be uploaded if available. This loading process makes the HMI application work faster and more smoothly.
Optimization
An optimization setting is available for this widget. This allows the widget to be used on low-performance devices.
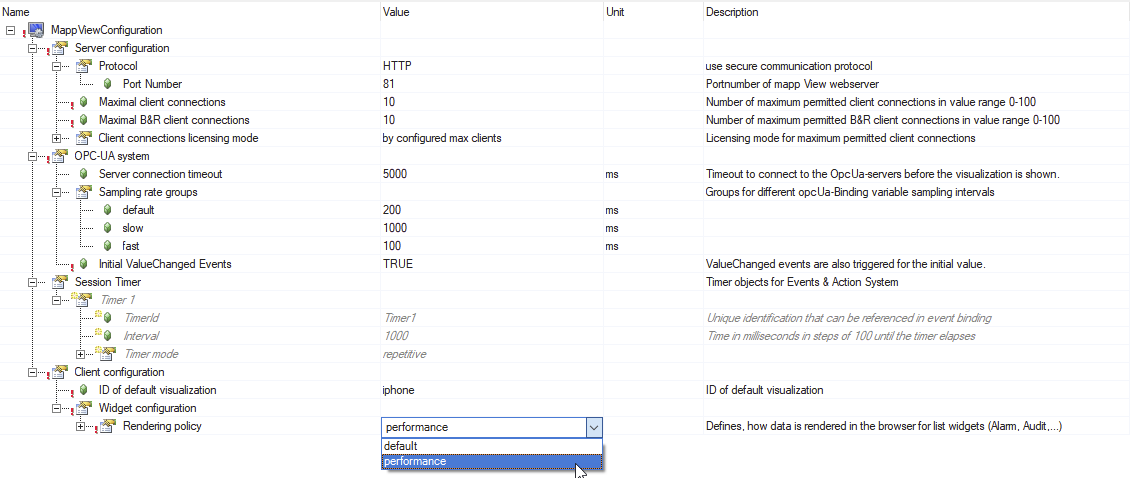
The setting is located in the configuration file (config.mappviewcfg) in the Configuration View.
The performance is set under "Widget configuration" and "Rendering policy" .

Two more properties must be adjusted for optimization of the alarm widget:
The following must be set: paging= false and rowHeight != 0. Section "rowHeight" describes what you have to take into account when changing the row height.
When using the optimized version, the alarms are displayed in a list with scroll bars, which means that external navigation cannot be used and property itemsPerPage is not applied.
When the widget's entry list is scrolled down, the top rows are removed and new bottom rows are added. This makes it easy to load 100 or 500,000 lines without overloading the browser.
rowHeight
If property rowHeight is set to 0, the row height will automatically adjust to the contents of the widget.
If property rowHeight is changed or must be !=0 (to get an optimized widget), the fontSize and cellPadding properties should be taken into account.
These dependencies are calculated as follows:
The font size not only has the projected pixel value, but depending on the value also 1 to several "subline" pixels for representation of e.g. "p, g, q, etc.".
→This means the minimum rowHeight that can be set results from "fontSize + the top/bottom values for cellPadding".
If rowHeight is smaller than the size calculated by fontSize + top/bottom, it will be adjusted automatically; larger values will be displayed correctly.
It must be noted that the table cells always adapt to the content (text) and not that the content (text) adjusts to the set row height.
Example:
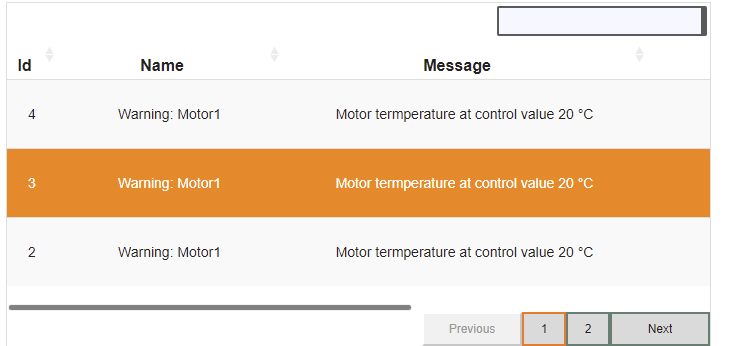
The widget has a row height of 70 pixels, a cell padding of 8 pixels and 14 pixels and a font size of 14 pixels.
|
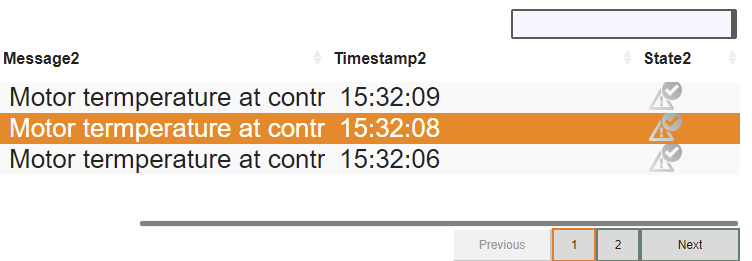
The widget has a row height of 30px, a spacing of 0px to 14px and a font size of 25px.
|
If property rowHeight in the Content Editor is changed from the automatic row size (0) to a different row size, the page must be reloaded to update the widget display.
Topics in this section:

